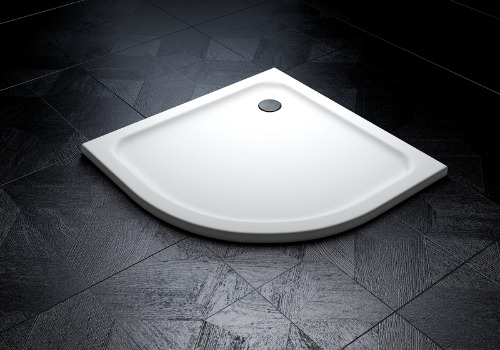
ABS (Acrylonitrile Butadiene Styrene) shower trays can be classified based on different factors such as shape, size, installation method, and design features. Here are some common classifications of ABS shower trays:
Shape:
Square: ABS shower trays that have a square shape with equal sides.
Rectangular: ABS shower trays with a rectangular shape, typically longer in one dimension.
Quadrant: ABS shower trays that have a curved front and fit into a corner, often used in corner shower enclosures.
Offset Quadrant: ABS shower trays with a curved front and an off-center drain, providing more showering space.
Size:
Standard Sizes: ABS shower trays are available in various standard sizes, such as 800x800mm, 900x900mm, 1200x800mm, etc.
Custom Sizes: ABS shower trays can also be customized to fit specific shower spaces and dimensions.
Installation Method:
Recessed: ABS shower trays that are installed flush with the floor, creating a seamless and integrated look.
Raised: ABS shower trays that are installed above the floor level, allowing for easier plumbing access and installation.
Design Features:
Anti-slip Surface: ABS shower trays with a textured or anti-slip surface to enhance safety and prevent slipping.
Low Profile: ABS shower trays with a low height, providing a sleek and minimalistic appearance.
Tiled Effect: ABS shower trays designed to mimic the appearance of tiled floors, offering a visually appealing aesthetic.
Besides,Installing an ABS (Acrylonitrile Butadiene Styrene) shower tray requires careful preparation and precise installation to ensure a proper fit and functionality. Here is a general guide on how to install an ABS shower tray:
Prepare the Area:
Measure the dimensions of the shower area to ensure the shower tray will fit properly.
Check the floor for levelness. If the floor is not level, you may need to make adjustments using a leveling compound.
Gather the Tools and Materials:
ABS shower tray
Silicone adhesive or sealant
Spirit level
Screwdriver or drill
Plumbers' putty or sealing tape
Adjustable wrench or spanner
Cleaning materials (e.g., cloth, sponge)
Position the Shower Tray:
Place the ABS shower tray in the desired position in the shower area.
Use a spirit level to check if the tray is level. Make any necessary adjustments by adding shims or adjusting the feet of the tray.
Connect Waste Outlet:
Locate the waste outlet on the ABS shower tray and ensure it aligns with the existing plumbing waste pipe.
Apply plumbers' putty or sealing tape to the waste outlet to create a watertight seal.
Connect the waste trap to the waste outlet and tighten the connections using an adjustable wrench or spanner.
Secure the Shower Tray:
Locate the fixing holes or flanges on the ABS shower tray.
Use a screwdriver or drill to secure the tray to the floor or wall studs. Follow the manufacturer's instructions for proper fixing methods and recommended fasteners.
Seal the Edges:
Apply a bead of silicone adhesive or sealant along the edges of the ABS shower tray where it meets the surrounding walls or enclosure.
Smooth out the silicone using a caulk smoothing tool or a finger dipped in soapy water. This ensures a neat and watertight seal.
Clean and Test:
Clean any excess adhesive or sealant using a cloth or sponge.
Let the adhesive or sealant dry according to the manufacturer's instructions.
Once dry, run a test by pouring water into the shower tray to check for any leaks.


 English
 Deutsch


